
DIY Christmas Ornaments from Recycled Materials: 6 Easy Zero Waste Ideas

Shop-bought ornaments are cheap, shiny and often made of plastic or glitter that can't be recycled. Homemade ones cost almost nothing, use things you already have, and they end up being the pieces your family looks for every December. The ideas below use kitchen scraps, old clothes, paper bags, cardboard and things you can pick up on a walk.
Most of them take less than an hour, work well with kids, and many of them can go in the compost or the recycling bin when they finally wear out.

Before You Start: A Simple Recycled Craft Kit
You don't need to buy a craft kit. Collect these as they come through the house:
- Paper: brown paper bags, old maps, sheet music, book pages from damaged books, last year's Christmas cards, cereal boxes.
- Fabric: worn-out sweaters, socks without a partner, felt offcuts, ribbon from gifts you received.
- From the kitchen: oranges, cinnamon sticks, wine corks, jar lids, clean tin can lids (sand the edges or cover them with tape).
- From outside: pine cones, small twigs, acorns, dried leaves.
- Tools: scissors, a hole punch, a darning needle, cotton string or garden twine, and a glue you already own.
1. Dried Orange Slice Ornaments
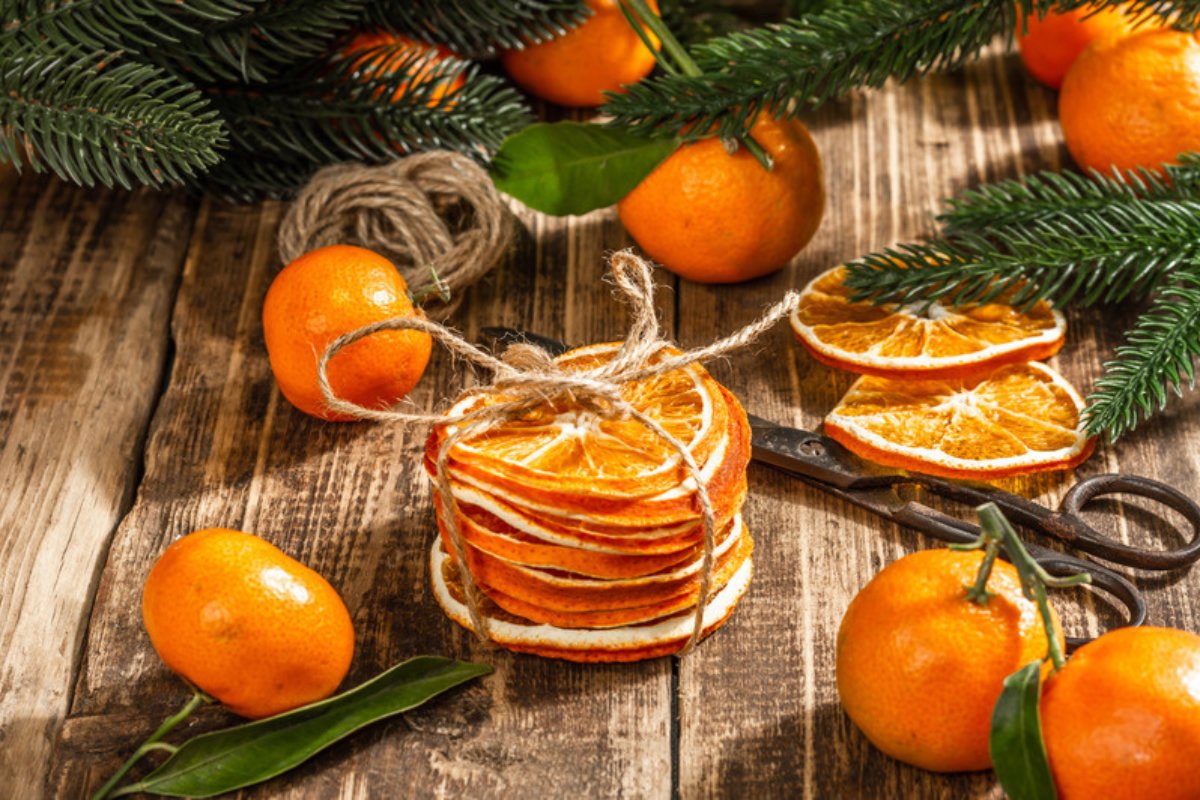
Dried orange slices are one of the easiest natural decorations you can make. They glow when the tree lights hit them and they smell like the holidays.
How to make them
- Cut two or three oranges into slices about 1/4 inch (5 to 6 mm) thick. Thinner slices dry faster and stay flat.
- Press each slice between clean kitchen towels to remove as much juice as you can.
- Lay the slices on a baking tray lined with a reusable baking mat or parchment.
- Dry them in the oven at the lowest setting, around 200°F (90 to 95°C), for 3 to 4 hours. Turn them every hour so they don't curl.
- Let them cool overnight on a rack. They should feel dry and stiff, not sticky.
- Thread a piece of twine through the top of each slice and tie a loop.
Stack three slices with a cinnamon stick for a small bundle, or thread ten of them on one long string for a garland. Keep an eye on the oven, especially near the end, and never leave it running while you're out of the house.
2. Pine Cone Ornaments and Garlands
 DIY Recycled Paper Projects: Eco-Friendly Crafts You’ll Love
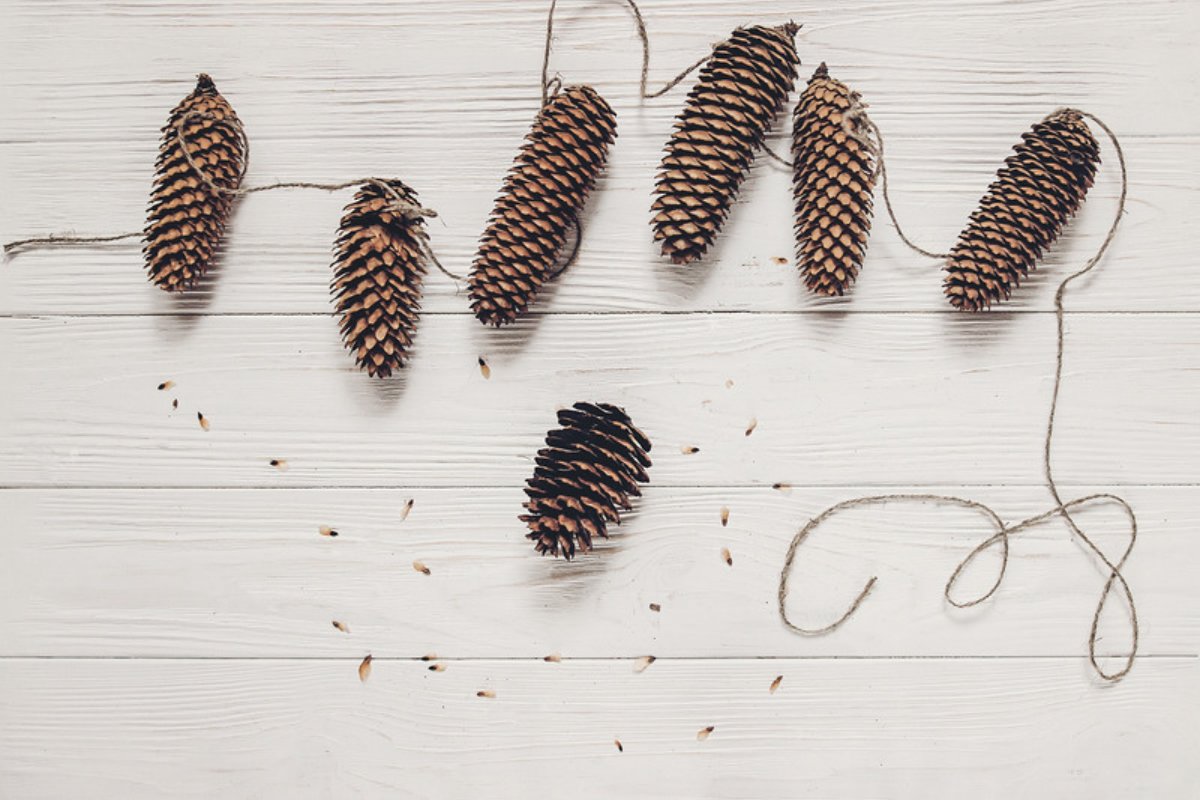
Pine cones are free, sturdy and already shaped like tiny trees. Collect them from a park or your own yard (only take fallen ones, and leave plenty for wildlife).
To clean them, shake off the dirt, brush away loose bits with an old toothbrush, and let them dry on a tray in a warm room for a few days. Some people bake them on a low setting to dry them faster, but stay close because dry cones and sap catch fire easily. Air drying is the safer choice.
Then try one of these:
- Simple hanging cone: tie a loop of twine around the top scales and hang it as is.
- Snowy tips: dab the edges of the scales with leftover white wall paint for a frosted look, without glitter or fake snow.
- Pine cone garland: tie several cones along one long piece of jute string, about a hand's width apart. Hang it on the tree, a mantel or a staircase.
3. Paper Bag Stars and Other Paper Ornaments
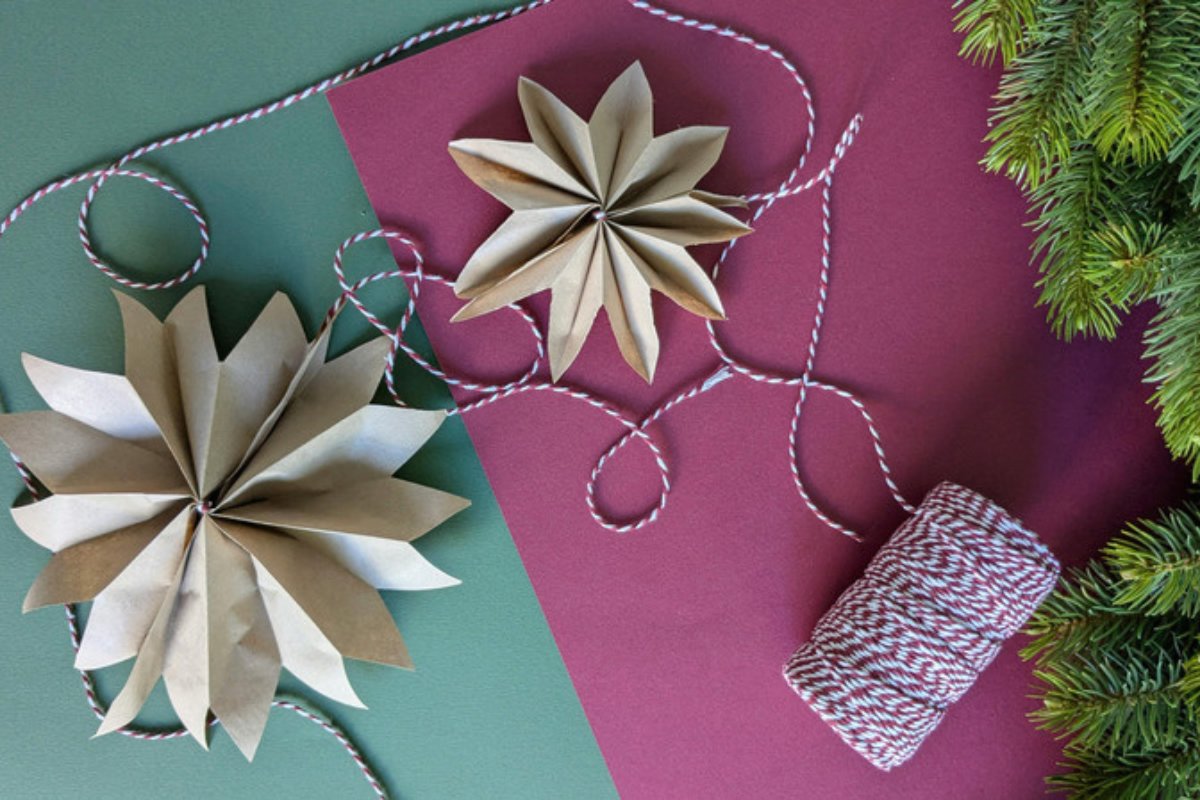
Brown paper lunch bags or bakery bags make beautiful folded stars. They look a bit like snowflakes and need only paper, glue and scissors.
Paper bag star
- Stack 8 to 10 flat paper bags. Glue each one to the next in a "T" shape: one line along the bottom and one up the middle.
- Once the glue is dry, cut the open end into a point or a curve. Cut small shapes along the sides for a lacy look.
- Open the stack like a fan and glue the first bag to the last one to close the star.
- Tie twine through one point to hang it.
More paper ideas
- Old Christmas cards: cut out circles, punch a hole and thread them on string. You can also fold three circles in half and glue them back to back for a 3D ball.
- Book page cones: roll a damaged book page or sheet music into a small cone, glue the seam and add a loop at the top.
- Cardboard shapes: trace a star, a tree or a house on a cereal box, cut it out and paint the plain side.
For more ways to use scrap paper, see our guide to DIY recycled paper projects.
4. Felt and Fabric Scrap Ornaments
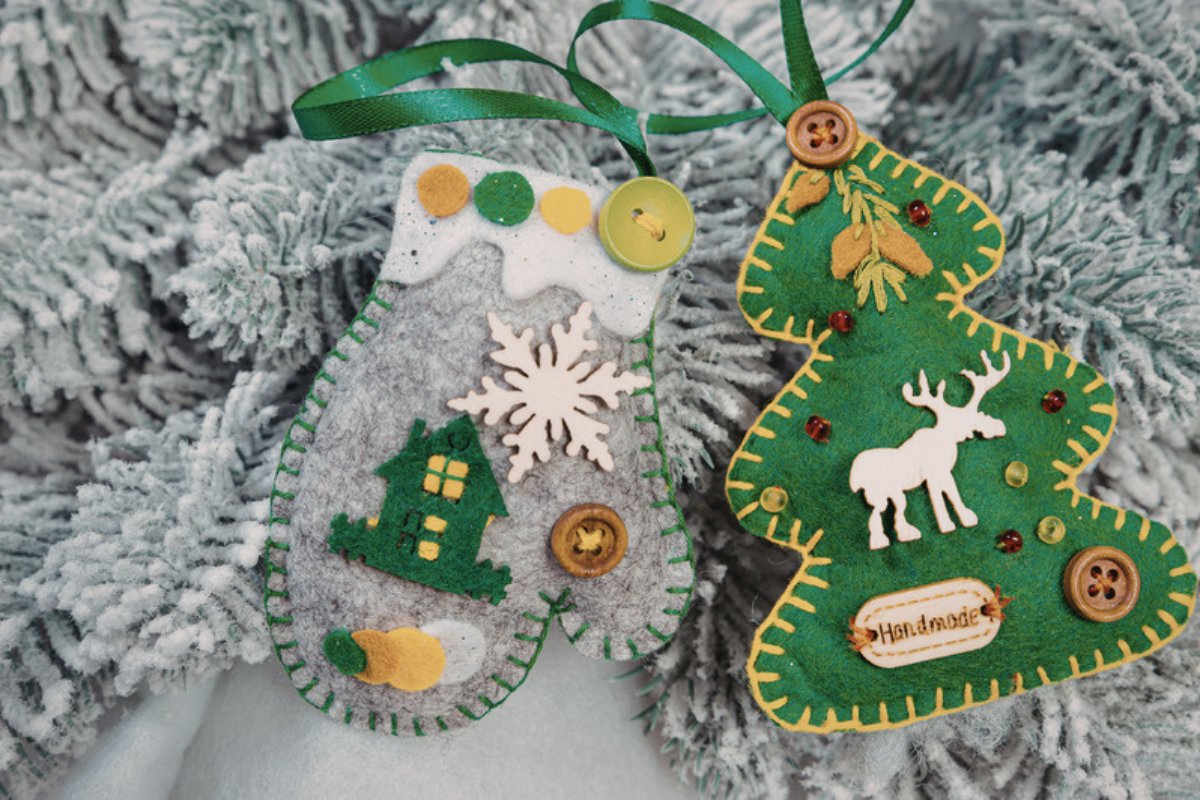
A sweater with a hole in the elbow or a single sock can become a set of soft ornaments that won't break if the cat knocks them down. Felted wool sweaters are ideal because the edges don't fray when you cut them.
Related reading:DIY Recycled Paper Projects: Eco-Friendly Crafts You’ll Love Eco-Friendly Christmas: Sustainable Ideas for Decorations, Gifts, and More
- Draw a simple shape on paper (mitten, tree, heart, star) and cut it out to use as a template.
- Trace it twice onto the fabric and cut out both pieces.
- Sew the two pieces together around the edge with a blanket stitch, leaving a small gap.
- Fill with fabric offcuts or wool scraps, then sew the gap closed.
- Add a button, a bit of embroidery or a small fabric patch, and a loop of ribbon or twine at the top.
If you don't sew, glue the edges with fabric glue instead. Old buttons from a jar make great decoration, but keep them away from babies and toddlers who might put them in their mouths.
5. Salt Dough Ornaments

Salt dough is a classic for a reason: it's made from pantry staples, kids love rolling and cutting it, and the ornaments last for years if you store them in a dry place.
Basic recipe
- 2 cups plain flour
- 1 cup table salt
- About 3/4 cup warm water
- Mix the flour and salt, then add water a little at a time and knead until the dough is smooth and not sticky.
- Roll it out to about 1/4 inch (5 to 6 mm) thick and cut shapes with cookie cutters or a glass.
- Make a hole near the top with a straw for the string.
- Bake at a low temperature, about 250°F (120°C), for 2 to 3 hours, until hard and completely dry. Thicker pieces need longer.
- When they're cool, paint them with leftover paint or leave them plain.
Important for pet owners: salt dough contains a lot of salt and can make dogs and cats very sick if they eat it. Veterinarians warn about this every December. Hang salt dough ornaments high on the tree, out of reach of pets, or skip this idea if you have a curious dog.
6. Wood, Cork and Other Leftover Materials
Small bits of wood and things from the recycling bin can become rustic ornaments with almost no tools:
- Twig stars: tie five straight twigs of the same length into a star shape with twine at each corner.
- Wine cork reindeer or snowmen: glue two or three corks together and add twigs, buttons or felt.
- Jar lid frames: put an old family photo or a child's drawing inside a metal jar lid and hang it with ribbon.
Quick Comparison: Which Ornament Should You Make?
| Ornament | Time | Good with kids? | End of life |
|---|---|---|---|
| Dried orange slices | 3-4 hours (mostly oven time) | Yes, with adult help at the oven | Compost |
| Pine cones | 20 minutes + drying | Yes | Compost or garden |
| Paper bag stars | 30 minutes | Older kids | Paper recycling or compost |
| Felt and fabric | 1 hour | Older kids | Keep for years, reuse the fabric |
| Salt dough | 3 hours (mostly baking) | Yes, very | Keep for years |
| Twigs and wood | 20-40 minutes | Yes | Compost (if unpainted) |
Tips to Keep Your Ornaments Truly Low-Waste
- Skip the glitter. Most glitter is tiny pieces of plastic that end up in drains and soil. Use texture, paint or natural materials instead.
- Store them well. Wrap ornaments in old newspaper or tissue and keep them in a shoe box in a dry place. Dried fruit and salt dough can go soft or moldy in damp basements.
- Plan for the end. When an orange slice or pine cone ornament is past its best, remove the string and put it in the compost.
Frequently Asked Questions
How long do dried orange ornaments last?
If they are completely dry and stored in a cool, dry place, dried orange slices can last for a couple of seasons. If you notice any soft spots or mold, compost them and make a fresh batch.
Can I make these ornaments with young children?
Yes. Pine cones, paper ornaments and salt dough are great for little hands. Adults should handle the oven, sharp scissors and any hot glue, and keep small parts like buttons away from toddlers.
What can I use instead of glitter?
Try white or metallic paint on pine cone tips, natural textures pressed into salt dough, dried flowers, spices like star anise, or small cutouts from old Christmas cards. They all add sparkle without microplastics.
Related reading:DIY Recycled Paper Projects: Eco-Friendly Crafts You’ll LoveEco-Friendly Christmas: Sustainable Ideas for Decorations, Gifts, and More Zero Waste Holidays: How to Celebrate Sustainably All Year Round
You Might Also Like
- Zero Waste Gift Wrapping: 9 Paper-Free Ideas for Christmas
- Eco-Friendly Christmas: Sustainable Ideas for Decorations, Gifts, and More
- DIY Recycled Paper Projects: Eco-Friendly Crafts You'll Love
Homemade ornaments don't need to look perfect. A slightly crooked star or a lumpy salt dough heart is part of the charm, and each one carries a memory of the afternoon you made it. Start with one idea this weekend and add a few more each year.


You may also like